

|
|
|
|
|
|
Account numbers are used for different purposes in WESPaC Financial Management, Human Resources, and the Student Management system. There are occasions when a new account number is needed to process a Requisition, Purchase Order, Accounts Payable Invoice or other process.
Click FINANCIAL MNGMNT.
Click CHART OF ACCOUNTS.
Click +ADD to open the Account Add screen:

Either enter the following account information or click the ![]() button to the right of each field, select an account description, and click SELECT:
button to the right of each field, select an account description, and click SELECT:
Fund: the budget fund
Type: the account type
GL Account: the General Ledger type
Additional fields below the first three may be entered or selected based on the purpose of the account.
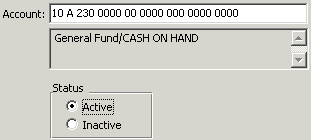
Click OK to accept these selections. This screen closes and an underlying Account Add screen opens. The Account description appears at the top of the screen.

Status: The default value is Active, though Inactive may be selected.
Level 1 through Level 3 and Category: These are optional fields that may be used for reporting purposes and budget verification.
Encumbrance Sum Code: Either select an encumbrance summary code from the menu or click ENCUMBRANCE SUM CODE. If you click this button, you have the option to either select a summary account or create a new one:
Select a summary account: Highlight an existing summary account and click SELECT.
Create a new summary account: Click +ADD.
Enter the Summary Account Code, Description, and Account.
Click OK.
Expense Summary Code and Revenue Summary Code: Select one of these if the account type is Expense or Revenue.
Either select a summary code from the menu or click the button (EXPENSE SUMMARY CODE or REVENUE SUMMARY CODE). If you click this button, you have the option to either select a summary account or create a new one:
Select a summary account: Highlight an existing summary account and click SELECT.
Create a new summary account: Click +ADD.
Enter the Summary Account Code, Description, and Account.
Click OK.
Either click +ADD & AGAIN to add additional accounts or click OK if you are finished.
Page Updated 12/05